We have been enjoying our new space and have not completed any home improvement projects in the last six months. We have been too busy sitting in our new comfy sofa and watching our new flat screen TV -both rewards for finishing the upstairs- to be bothered with anything else.
But, we are getting antsy and feel like we need to get busy soon. We've started cleaning out the "crap room," which has housed anything that didn't have a spot for the past six years. Until recently, we would just open the door, drop the item in need of storage, turn, and exit. It was our dirty little secret. However, we have emptied the room of most of its contents, made multiple trips to the Savers donation center, and found a lot of treasures that we had forgotten about.
We're beginning to formulate the floor plan and will get started soon. The Old Arnold bedroom will transform into the new master bath!
Monday, December 28, 2009
Saturday, August 1, 2009
Post party post

So...we have been intentionally holding back until we had the big 142nd birthday party and could reveal the house to family and friends. For the last two months we have been working at a furious pace attempting to get things done for the party. We were able to finish the two upstairs bedrooms, the stairway, and the "Landing," as we are now referring to the new TV room. We're taking a well deserved break and figuring out what to tackle next.
 Our bedroom closet
 Our bedroom
 The landing, the photo does not do justice to the blue accent wall
 The landing
 The "green room," before we added furniture
Thanks to everyone who helped us along the way, we could not have done it without you!
Wednesday, May 27, 2009
Happy 142nd Birthday!

Addison says: any excuse for an ice cream cake is a good one!
So today is the house's 142nd birthday. You may think it is odd that know the date, but we actually found it inscribed on the sill of the original portion of the house.
We made our discovery after we pulled out the old, narrow set of stairs and the old clapboard siding along the now interior stair wall. From what we can tell, that wall was the original exterior wall of a much smaller version of our house.
Addison's eagle eye noticed faint lettering, and after much deciphering we were able to read: May the 27th 1867 L.W. Needham. A quick Google search identified Lyman Needham as a local carpenter in our Village during the mid-1800s (how cool is it that we could Google that!). We did tax roll research to determine who Needham built the house for - John Denu Sr., a German immigrant that arrived in Wisconsin in 1866, shortly before he bought our lot.

Knowing that the house has been standing for 142 years has caused us to think about all the lives that have passed through these walls before us. How many babies were born here and how many families called this their home?
It's just a vernacular old house, but it's ours. And we plan to leave it better than we found it. Maybe a future family will celebrate the 200th birthday.
Sunday, May 10, 2009
Addition Part 2
We invited everyone we knew, and a lot of people came hundreds of miles to help us build an addition. We were very optimistic and thought it would after a long weekend with a lot of hands, we'd end up with a working, interior, stairway. Taking it down was the easy part. We encountered rain, which started as soon as the floor of the old addition was pulled, causing standing water in the basement and a work stoppage (good thing we drylocked). We also found that the concrete block foundation was not level and required several hours of sawing to fix. We also found that no one at the super home center knew what a potato shovel is. We planned to use it to strip the old roof. One guy asked if my husband made it up to keep me out of the house.

We chose to balloon frame with 22-foot 2x6s for the wall frame with a cathedral ceiling. The interior would house stairs going up and down. We figured we'd worry about windows, siding, and all the other details later. We did have to pick out the roof shingle color at the time and looking ahead to the future painting of the entire house, went with a lovely Estate Gray architectural shingle. Although this was our first roofing project (of our own), we bought enough shingles to do the entire house (nothing like planning ahead).


Once we got started late in the afternoon, the wall framing went up quickly and we were done by nightfall. Next we tackled the roof. We had to tear off the old layers of individual lock-down asphalt shingles and wood shake and the original decking on the side of the house where the addition was. Then we had to attach new decking, tie in the roofline of the addition, attach tar paper, and shingle. We were fortunate to have an adjacent one-story roof that provided a staging area. After the roof was on, we attached the exterior sheeting and wrapped it with house wrap. Then everyone decided it was time to go home.

It was a very long and tiring weekend and we got a lot done. We appreciate everyone's time and contribution and would never be where we are now without them. We continued to work on the interior stairs for a long time, and will include more details later.
(Turn your head sideways for this one)
Lessons learned: There is such a thing as a potato shovel, patience is a virtue, drinking cream-based alcohol beverages (i.e. Hot Sex) all day is never a good idea, if the foundation isn't quite level just shoot a level line at the top, 12 people in a single house with one bathroom is very cozy.
Items found: A lot of plastic shopping bags stuck into nooks and crannies, the Arnolds like to use tar to patch everything, the original storyboard for the clapboards, and years worth of dust and grime.
Thank you: Tom, Kathie, Trina, Isaac, Loren, Amanda, Derek, Adam, Eric, Nicole, Crystal, and Eddie.
Thursday, May 7, 2009
The Real Master Bedroom
Today was the day, we just couldn't wait any longer. We moved into the new master bedroom, formerly the "guitar room." There are still finishing touches, like the trim, crown moulding, touch-up paint, closet doors (who'd think that they'd be special order??), and real bedroom furniture (hello Ikea!). Even Frank's bed has made it's way upstairs. He's still not sure what to think, but it won't be long before he realizes that he's at eye level with the squirrels outside.
Since we've been so focused on moving into the new room, we've neglected blogging on the BIG addition project, stay tuned...
Since we've been so focused on moving into the new room, we've neglected blogging on the BIG addition project, stay tuned...


Thursday, April 30, 2009
Saying Goodbye to the Mini-Master Bedroom
Very soon we are moving upstairs to our NEW Master Bedroom, and we're thinking about the past projects in our downstairs "temporary" bedroom. Since we spend so much time in this room, it got a lot of attention early on. When we bought the house, it had been Mama Arnold's bedroom and was in serious need of a face lift. The walls were an anemic shade of purple, the trim was white in places, and the floor was covered in a lovely green area rug with a cutout or the air vent.
 The before, note the walls, trim, and rug
We started by painting the walls a crisp shade of light blue and the trim a clean, consistent white. We tried to install more electric outlets, the room had zero to start with, and found that the exterior walls had been filled with clay blocks as a firestop/insulation method. This is the 147 year old section of the house and we were lucky that this was all we found in the walls. We were able to install three outlets and we eventually installed a switch for the overhead light and ceiling fan. Hello twenty-first century!
To create a sense of privacy, we reframed the existing large entry and installed French doors with trim that we found to match what was left of the original trim in the adjacent "parlor."
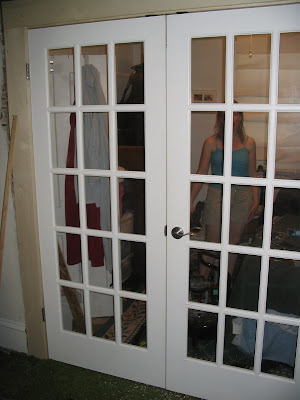 The doors shortly after install, the trim is not done
We pulled out the old area rug and found the previous floor treatment - a lovely tarpaper that was hard to part with. We went with a wood laminate that we installed ourselves - of course. It was a fun-filled weekend with a lot of sore, bruised knees and aching backs.
 Brew and Frank on the new floor
Lessons learned: Engineered flooring is not as durable as the fake laminate when it comes to dog nails, it's impossible to wire with clay in the walls, and small rooms DO NOT equal small projects.
Items found: Probably some junk we can't remember and the clay blocks in the wall.
Thank you: Jason for helping with the electrical and Amanda and the rest of the move-in-and-paint crew!
Items found: Probably some junk we can't remember and the clay blocks in the wall.
Thank you: Jason for helping with the electrical and Amanda and the rest of the move-in-and-paint crew!
Saturday, April 25, 2009
Creating a master bedroom
So we're back to work after going to Minnesota to visit family for a weekend. Our focus is the upstairs, we want to move up before summer gets here. It's been a long process, plagued by long work weeks, lives outside our house, and complacency, punctuated by occasional bouts of fun. But we're back at it with a vengeance.
Today we wainscoted the master bedroom (we had finished bedroom #2 a few weeks ago) and got started on the wall treatments for the media room/lounge (vote on the room name later). When we first saw the soon-to-be master bedroom, it was filled with guitars, furniture from every era, and painstakingly placed cut-outs from muscle car magazines that had been pasted to the walls (thank you Arnolds). Wherever the muscle cars weren't, there was faux walnut Formica paneling. The dipping ceiling was held in place with fender washers. You may ask, "what were they thinking?" Truth is, we saw a lot of potential, but maybe not all the hard work involved.
Today we wainscoted the master bedroom (we had finished bedroom #2 a few weeks ago) and got started on the wall treatments for the media room/lounge (vote on the room name later). When we first saw the soon-to-be master bedroom, it was filled with guitars, furniture from every era, and painstakingly placed cut-outs from muscle car magazines that had been pasted to the walls (thank you Arnolds). Wherever the muscle cars weren't, there was faux walnut Formica paneling. The dipping ceiling was held in place with fender washers. You may ask, "what were they thinking?" Truth is, we saw a lot of potential, but maybe not all the hard work involved.

The room prior to our purchase, note the guitars and car images pasted on the wall and single light fixture that was also the only outlet
 The ceiling, before our efforts. The treatment looked like wrapping paper and you can see the fender washers that were holding it in place.
It's been a long process. To get to this point, we had to build an addition with functional stairs so that we could haul materials (and eventually a bed) up, rewire and update the HVAC system, wrack our brains over how to reconfigure the space, and find inspiration to get started. More on all that work later.
To create a master bedroom, we closed off a doorway to an adjacent room, jacked the ceiling and sistered on new joists to the existing joists, created a new ceiling with plywood and sheetrock, replastered the walls, rewired and added several outlets, created a closet, and painted the walls and added wainscoting. We spent over an hour this evening at Menards looking at floor treatments.

The closet, the small speck on the wall is the lone guitar that we left intact

The muscle cars after the paint and before the wainscoting
 Covering up the cars
Our message for anyone who removes the wainscoting
To finish the room we need to: install floor treatment, paint the trim and wainscoting, install closet and entry doors and closet system, and haul everything from our temporary bedroom upstairs. More images to follow as we wrap everything up.
It's been a sad week, we lost our faithful remodeling assistant, Brew, our 11 year old lab mix. She tended to get underfoot, but was eager to help with the beer drinking at the end of the day and never criticized our work.
 Brew inspecting our progress
Lessons Learned: The Arnolds LOVED guitars and muscle cars, we're still awesome at picking paint colors, and white glue is a good muscle car-to-wall adhesive.
Items founds: Secret nudie image behind the Formica wall, sewing needle under a baseboard, old newspaper fragments, four different wallpaper examples, a few lone guitar images among the muscle cars, and a Winchester rifle warranty.
Thank you: Everyone who helped us build the addition so we could continue to work upstairs, Isaac for helping mud and sand the sheetrock, Jason for helping with the electrical, and Bonnie and Loren for helping to haul all the plywood and sheetrock upstairs over Thanksgiving weekend.
Subscribe to:
Posts (Atom)
